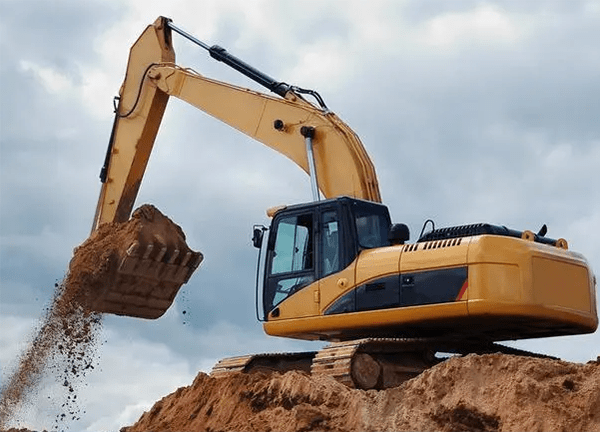
Figure 1: Excavator.
Mining wear parts are essential components of any mining operation. They are designed to withstand the harsh conditions and extreme wear and tear that come with mining activities. These parts include everything from excavator teeth to conveyor belts, and they play a critical role in ensuring that mining operations run smoothly and efficiently.
However, like all mechanical components, mining wear parts are subject to wear and tear over time. As such, it is important to test these parts to ensure their effectiveness and durability. In this article, we will explore some of the methods used to test mining wear parts.
1. Factors Affecting Wear Parts Durability
Before delving into the testing methods for mining wear parts, it is important to understand the factors that affect the durability of these parts. Some of the key factors include:
● Material Composition: The type of material used to manufacture mining wear parts plays a significant role in their durability. For instance, parts made from high-strength alloys tend to last longer than those made from standard materials.
● Operating Conditions: The operating conditions of mining equipment also affect the lifespan of wear parts. Factors such as temperature, pressure, and moisture levels can cause parts to wear out faster.
● Maintenance Practices: Regular maintenance is crucial in ensuring the longevity of mining wear parts. Proper lubrication, cleaning, and inspection can help prevent premature wear and damage to these components.
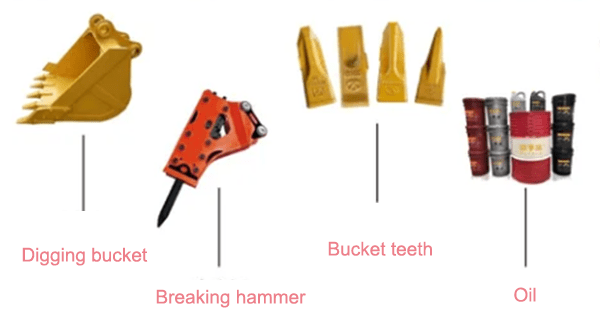
Figure 2: Mining parts.
2. 9 Testing Methods for Mining Wear Parts
There are several testing methods used to evaluate the effectiveness and durability of mining wear parts. Here are some of the most common techniques:
2.1 Visual Inspection
Visual inspection is a simple and effective way to test mining wear parts. Before and after each use, mining wear parts should be inspected for signs of wear and damage. Any wear or damage should be addressed immediately to prevent further damage and downtime.
Visual inspection can also be used to identify opportunities for upgrading wear parts. For example, if wear parts are frequently experiencing damage in a certain area, upgrading to a wear-resistant material or improved design may be necessary.
2.2 Material Analysis
High-quality parts are typically made from materials with excellent wear resistance, such as alloy steel, high-chromium iron, and tungsten carbide. Material analysis can be done using techniques like:
● X-ray fluorescence (XRF): A non-destructive method used to determine the elemental composition of materials.
● Optical emission spectrometry (OES): A technique that measures the light emitted by a sample when subjected to a high-energy source, providing information about the material's composition.
● Scanning Electron Microscopy (SEM): A method that allows for the examination of the microstructure of materials at high magnifications.
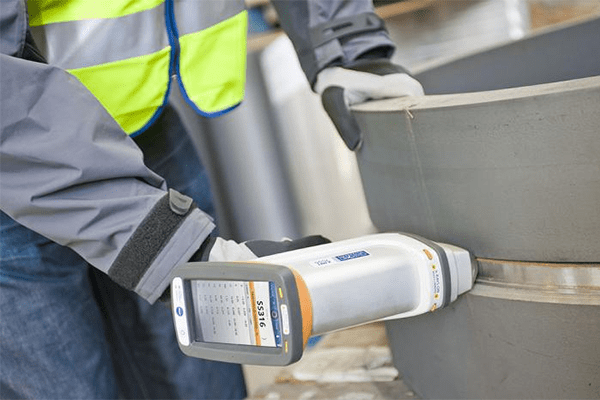
Figure 3: X-ray fluorescence spectrometer.
2.3 Ultrasonic Testing
Ultrasonic testing is a non-destructive testing method that uses high-frequency sound waves to detect defects in mining wear parts. Ultrasonic testing can detect cracks, voids, and other defects that may not be visible during visual inspection.
Ultrasonic testing is a reliable and accurate method for testing the effectiveness and durability of mining wear parts. It can help identify potential issues before they result in equipment failure and downtime.
Ultrasonic testing can also be used to assess the quality of new wear parts before they are installed, ensuring that they meet the necessary specifications.
2.4 Hardness Testing
Hardness testing is a common testing method for mining wear parts. It involves measuring the resistance of wear parts to indentation or scratching. Hardness testing can provide information on the wear resistance of different materials and can be used to select the most appropriate materials for specific applications.
There are several hardness testing methods, including the Rockwell, Brinell, and Vickers methods. Each method has its advantages and disadvantages, and the appropriate method should be selected based on the specific application and wear part being tested.
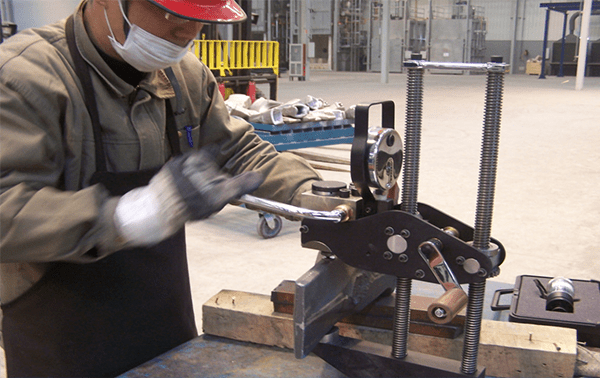
Figure 4: Bucket tooth hardness test.
2.5 Impact Testing
Mining equipment often experiences heavy impact loads during operation. Therefore, it is essential to assess the impact resistance of mining wear parts.
Impact tests involve subjecting the part to a controlled impact load and evaluating its ability to absorb energy without fracturing. The most commonly used impact test is the Charpy impact test, which measures the energy absorbed by a material during fracture.
2.6 Wear Testing
Wear testing involves subjecting mining wear parts to simulated wear and tear to assess their effectiveness and durability. Wear testing can help identify wear patterns, wear rates, and potential failure points for wear parts. Wear testing can be performed using different methods, including pin-on-disk testing, abrasion testing, and erosion testing.
● Pin-on-disk testing involves rubbing a wear part against a rotating disk under controlled conditions. The wear rate and friction coefficient of the wear part can be measured, providing information on its effectiveness and durability.
● Abrasion testing involves subjecting a wear part to abrasive materials under controlled conditions. The amount of material removed from the wear part can be measured, providing information on its wear resistance.
● Erosion testing involves subjecting a wear part to high-velocity particles or fluids under controlled conditions. The amount of material removed from the wear part can be measured, providing information on its erosion resistance.
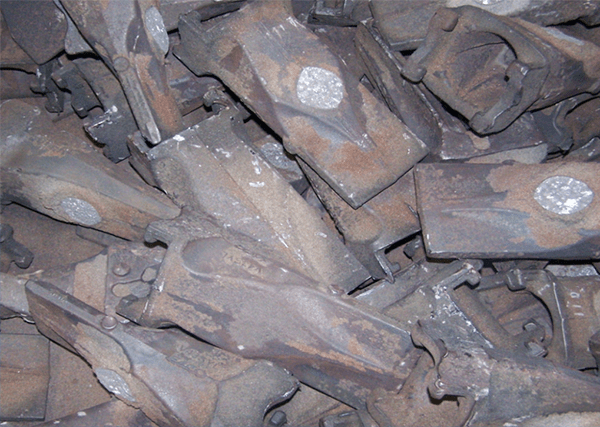
Figure 5: Excavator bucket teeth.
2.7 Corrosion Testing
Corrosive environments can significantly affect the durability of mining wear parts. Corrosion tests are designed to evaluate the material's resistance to various forms of corrosion, such as uniform corrosion, pitting corrosion, and intergranular corrosion. Some commonly used corrosion testing methods include:
● Salt spray test: A test that subjects the material to a continuous saltwater spray to evaluate its resistance to corrosion.
● Potentiodynamic polarization test: A test that measures the corrosion rate of a material by applying a varying potential to the sample and monitoring the resulting current.
2.8 Fatigue Testing
Fatigue is the weakening of a material due to cyclic loading, leading to failure over time. Mining wear parts are often subjected to fluctuating loads during operation, making it essential to evaluate their fatigue resistance.
Fatigue tests involve applying cyclic loads to a sample and analyzing the component's ability to withstand these loads without failure. Popular fatigue testing methods include:
● S-N curve testing: A test that plots stress (S) against the number of cycles to failure (N) to determine the fatigue life of a material.
● Strain-controlled fatigue testing: A test that measures the fatigue life of a material subjected to a specific strain amplitude.
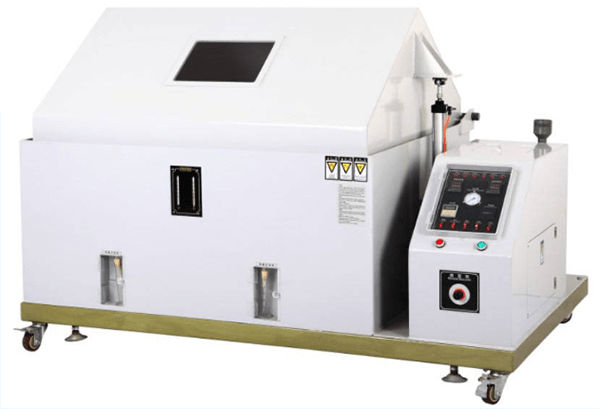
Figure 6: Large salt spray test machine.
2.9 Field Testing
Field testing involves testing mining wear parts under actual operating conditions. Field testing can provide valuable information on the effectiveness and durability of wear parts in real-world conditions. Field testing can also help identify opportunities for optimizing wear part performance and selecting the most appropriate wear parts for specific applications.
Field testing can be performed using different methods, including wear monitoring, performance monitoring, and failure analysis.
● Wear monitoring involves measuring the wear and tear of wear parts over time.
● Performance monitoring involves measuring the performance of wear parts over time, such as their efficiency and productivity.
● Failure analysis involves analyzing wear parts that have failed to identify the cause of failure and prevent future failures.
3. Conclusion
To ensure the effectiveness and durability of mining wear parts, it is essential to perform a series of tests that assess the material properties, wear resistance, impact resistance, and other critical performance parameters.
By conducting these tests and evaluating the results, manufacturers and users can ensure that mining wear parts meet the required quality standards, leading to increased efficiency and reduced downtime in mining operations.


